skip to main |
skip to sidebar
But the build is slowly progressing. Since my last update I have fitted new bars, and created a rear fender, and new tail lights, removed the battery box! All this but forgot to update this blog.
Bars are Euro bend bars from mikesxs.com I fitted them properly, then turned them upside down just to see, and loved it. So upside down they stay. At the same time I fitted another front brake master cylinder. Its off a newer Yamaha, but I forget which one. It made such a huge difference, I can actually feel how much pressure I am pulling on the brake!

The rear fender is cut down from a Honda Shadow front fender. It was surprising easy to fit. Its still too deep I want to cut it down more for a lighter look. New tail light is a Sparto copy, and attached to that is a tube type rego label holder.

I pulled the battery box and am trying to work out where to put the new battery, I made a temporary sling for it, and seems to sit quite well under the seat. I will make a slim box to fit under the seat rails to hide the battery and wiring.

Now working on getting the clutch to work properly, waiting on a big order from Mikesxs...
Its been a frustrating week, to say the least!
Well... over the past weekend, I moved some of the wiring to create a cleaner look around where the battery sits. Well there were problems all round.. and I have been tearing my hair out trying to sort it, and its finally back up.
Every afternoon this week, I think I have had it sorted, and ended up pushing the thing back up the hill and into my driveway... cursing the day I bought it.
Anyways, must have picked up some shit into the carby, and it started running badly on the right side of the motor. In the arvo I drained the float bowls, and then started on the electrics. I pulled out the "reserve lighting relay" and looped it out. I moved the rectifier up to the top of the battery, to where the old relay was. Then re-routed all other wires to go up under the seat, rather than around the sides of the battery. It all looked much cleaner!

Long story short, after removing the float bowls twice to clean the jets, its all looking good. Then 6kms from home she dies... no power! Stupid thing not charging... Took me 4 afternoons to find that the rectifier that I moved was not grounding properly.... I was nearly ready to set it on fire until I found that. Lucky I am a patient man....
Anyways, I am thinking that the next thing I buy has to be a tail light. The bike is looking really slick, back until that huge old light on the back!

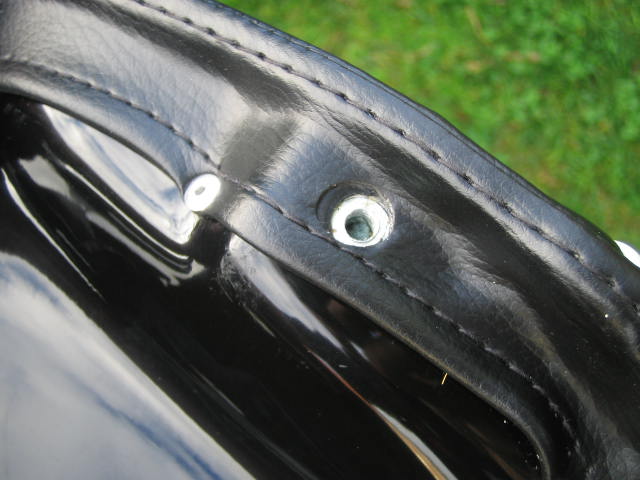
Before I go and spend hours/dollars on custom paint on the tank... I thought it best to do a mockup with contact. I thought the paint on the tank was stuffed.... but I gave it a good cut/polish and it came up really quite well. It needs to be repainted anyway, because there are 2 small dints in the tank where the top triple clamp has hit the tank (the stopper has rusted/fallen off the headset).
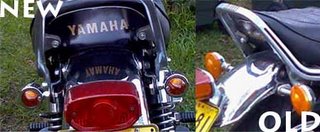
After that, I carefully stuck on a speed stripe, using white 3M motorcross number plate backing, nice thick contact. Then I made up a new 'yamaha' graphic in photoshop. I stickytaped the printout over the contact. the stuck that onto a chopping board and using a scapel, cut out the new graphic and stuck it on, letter by letter. Turned out better than I expected!
Bit of a problem with the font I used though... first 2 people I showed thought that the Y was too much like a N... think it says Namaha. So I have custom modified a new Y, that looks more Y-like in photoshop, but I am yet to make the sticker for it.

I think its looks pretty good now, even for a mockup! After looking at it for a while, decided to move the speedo from the left to the right side... now the white face is inline with the white stripe. Looks smoother.
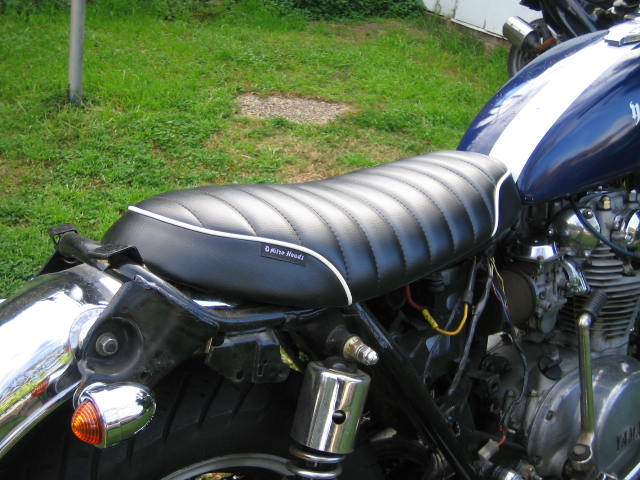
Now.... gotta fit that new seat.
Well, the next thing to change has to be the indicators... the original ones are attached to huge long stalks. I bought some crome bullets from Deus... and swapped them out. Very simple to fit the rear. Just reattached into the original holes. Wired straight into the existing plugs. Done.
The fronts were a bit more effort. I didn't want to attach to the existing mounts on either side of the headlight. I wanted a simplified look at the front, so moved the indicators down to the lower triple clamp. I made up some simple mounting brackets using some 3mm steel left over from a TV mounting bracket. These also wired in easily, the connectors terminate inside the headlight cover.

I had to find some temporary bolts to replace where the old indicators were, as they doubled as headlight bolts. I plan on replacing the headlight soon anyway, so looks of the bolts aren't too important at this stage.
Overall, its already looking cleaner!
The tank is looking shabby, so I think I will tackle that next.
Jambob.
Welcome readers, to my new project... the Yamaha XS650.
On this blog I will document the changes to my new bike as I build and customise it!
I caught the bug for old school jap bikes after reading an article in the sunday paper magazine about a new bike shop in Sydney. Deus Ex Machina specializes in japanese bikes with a unique old custom look. After visiting the store in Camperdown I became obsessed with the style, and decided I had to have something similar. Its not my style to buy one already done, because I believe that defeats the purpose of having a custom bike, the whole point is to do it yourself!
So began the long research project of what sort of bike to start with... after finding a link to Bratstyle.com and browsing through their gallery, I settled on a Yamaha XS650. I loved almost everything about it... but the engine is very cool / retro looking vertical twin, similar to a British twin (Triumph, Norton etc.). OK so now I have chosen the bike... which model do I choose to start? After looking at countless XS websites I chose a late model "XS650 Special" I liked the wheels and tank on this model. So best to start with something you like straight up. I then scoured the local classifieds and Ebay religously whilst saving some cash. It took over 2 months to find the bike I wanted.
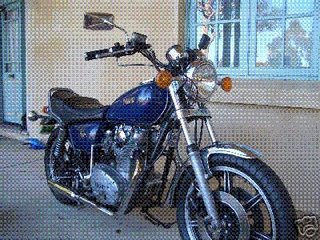 One night I was looking on Ebay, and there is was... tiny grainy pictures (see attached)... very little info... but it was there.. and 81 special, with a freshly rebuilt motor. I tried to contact the owner, for more info and got a very slow response, this was his first Ebay sale. I didn't find out the info I wanted, and asked more questions, when the response took to long... stuff it I thought and clicked "buy it now" I can always back out of the sale... at the cost of 1 negative feedback... big deal I thought... if this really is the bike I have been looking for. I am willing to take that risk. So I did. And I am very happy with my purchase!!!
So now... first thing... registration. I wanted to ride the bike as I do various things. I also wanted to make sure I was happy riding the bike before I spent time/money doing it up.
The bike had been sitting for more than a year unregistered, so needed a full inspection. Only thing was the speedo on the bike was no good.. the needle was broken off the dial!? I thought it would be cheaper to get one from the wreckers than to buy a custom one straight up. but I couldn't find one easily, and the prices were too much anyway. I looked at buying a custom one here is Australia... and the prices were outrageous to say the least... so I bought one off the Internet from mikesxs.com and had it shipped over, and was still way less than half the price of buying one locally. I fitted it up, and registered the next day.
Woohoo what fun to ride... and the custom build has started. first thing I did after having it registered was to tear off the rest of the intrument cluster and idiot lights. I left the one new speedo only (indicator lights built in).
Next up... indicators! those lollypop lights have to go!
JC